This article is Part 4 of a series on story development.
- Lesson one: How to Write a Logline [Video + Examples Included]
- Lesson two: How to Write a Good Story (11 Tips from an Actual Writer)
- Lesson three: Developing Your Characters
Introduction
Think of your screenplay outline as the blueprint for your story. Without it, you’re bound to hit dead ends, lose track of key plot points, or worse — spend weeks rewriting Act Two because you didn’t plan ahead.
An outline keeps you focused, helps structure your ideas, and gives you a clear roadmap before diving into script formatting. But where do you start? How detailed should it be? And what are the common pitfalls you should avoid?
Let’s break it all down so you can outline your screenplay with confidence.
Why is a Screenplay Outline So Important?
Ever tried assembling IKEA furniture without the manual? That’s what writing a screenplay without an outline feels like. Sure, you might finish, but the process will be full of frustration, backtracking, and plot holes you didn’t see coming.
A solid screenplay outline:
✅ Keeps your story structured – No wandering plotlines or dead ends
✅ Strengthens character arcs – Ensures each character’s journey feels intentional
✅ Improves pacing – Avoids long stretches where nothing happens
✅ Reduces rewrites – Saves time in later drafts
And if you’re worried about losing creative freedom — don’t be. Outlines aren’t meant to lock you in; they give you a foundation so you can experiment without derailing your entire story.
? Related Read: The Three Act Structure in Screenwriting
How to Build a Strong Screenplay Outline
1. Define Your Core Story Beats
Before you start structuring scenes, lock down your major story beats. Most screenplays follow a three-act structure:
? Act One: Introduce your characters and set up the central conflict
? Act Two: Raise stakes, build tension, and develop character arcs
? Act Three: Deliver a satisfying resolution
Want a deep dive into structure? Read Beat Sheets: Crafting Your Screenplay Structure for more on how acts and beats shape your script.
? Example Beat:
Detective Jones steals evidence to protect himself from blackmail, sparking a chain of events that threatens to destroy his career (and life).
2. Expand Your Beats into a Scene-by-Scene Breakdown
Once your beats are solid, expand them into scene descriptions.
- What happens in this scene?
- Who’s involved?
- Where does it take place?
- How does it push the story forward?
? Example Scene Description:
INT. POLICE STATION – NIGHT
Detective Jones pockets evidence. His partner catches him. A heated confrontation ends with Jones making a desperate promise to stay quiet.
Pro Tip: Your scene descriptions don’t need to be formatted like a screenplay yet. Keep it flexible — think of it as a blueprint for your story.
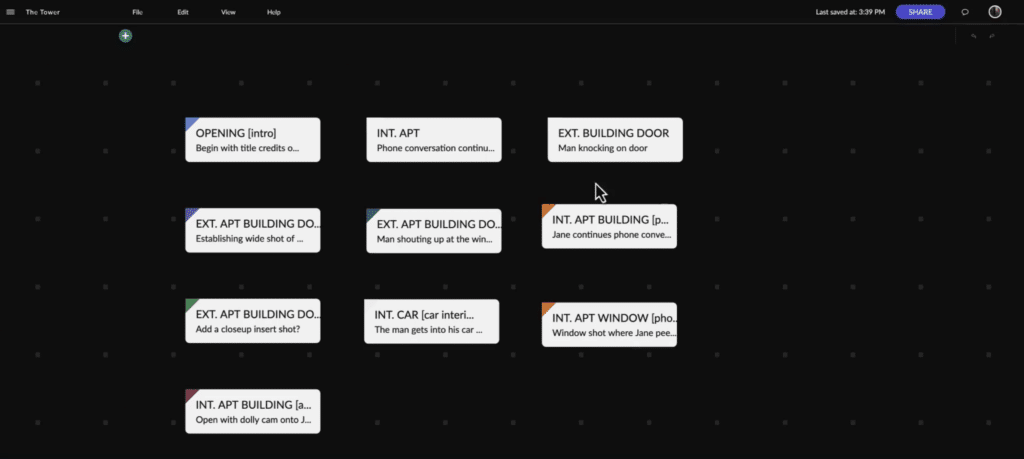
Use Celtx to organize your outline visually –
Drag and drop scenes, make quick adjustments, and keep everything in one place.
Get started for free today!
3. Avoid Common Pitfalls
? Skipping the Outline Entirely
Yes, some writers can “wing it,” but for most, writing without an outline leads to messy, unfocused drafts.
? Overloading with Details
An outline should be concise and functional. If you’re writing full dialogue and blocking, you’re drafting — not outlining.
? Forgetting Character Arcs
Your plot should evolve alongside your characters. Make sure each major character has clear growth throughout the story.

Visualizing Your Screenplay Outline: From Idea to Structure
Okay, so now you understand why an outline is crucial and how it helps shape your script. But how does this all actually look when it’s on the page? Let’s break it down with an actionable example that will guide you from your initial idea to a structured screenplay outline that’ll lead to a smooth first draft.
Step 1: Identify Your Three Acts
First things first: Your screenplay needs a structure. The classic three-act structure (beginning, middle, end) serves as the backbone of your outline. This is your skeleton. Think of it like building a house: you need a solid foundation before you start putting up the walls and decorating the rooms.
ACT ONE (Setup): This is where you introduce your characters, world, and the central conflict. The goal is to get your audience invested in the story.
ACT TWO (Confrontation): The bulk of your screenplay will be in Act Two. This is where your protagonist faces challenges, builds relationships, and has moments of growth. The tension should escalate as the conflict deepens.
ACT THREE (Resolution): Act Three wraps up the story, with a climax that resolves the conflict and brings closure to the narrative arcs.
Step 2: Break Each Act Down into Beats
Now, you need to break each act down into beats — specific moments or plot points that move the story forward. These beats should align with the classic story structure (inciting incident, midpoint, climax, etc.), but you can get creative with them. Here’s a simple outline for a generic action movie to show how it might look:
ACT ONE:
1. Opening Scene: Introduce our hero in their normal life. (We get a sense of who they are and what they want.)
2. Inciting Incident: Hero encounters an unexpected threat (something shakes up their world).
3. Decision to Act: Hero agrees to take on the mission (this is often where they make a commitment to the conflict).
ACT TWO:
4. First Major Obstacle: Hero faces the first challenge (tests their resolve).
5. Midpoint: Hero has a major setback, feels like all is lost (this is a key turning point in the story).
6. Second Obstacle: The stakes rise, and the hero faces an even bigger challenge (tension continues to build).
ACT THREE:
7. Climax: Hero faces off against the antagonist in a final confrontation (this is the high point of the story).
8. Resolution: Hero wins or loses, and the narrative comes to a satisfying end.
For more on story structure and beats of a wide selection of classic films and books, check out K.M Weiland’s Story Structure Database.
Step 3: Flesh Out the Scenes
Now that you’ve got your beats in place, it’s time to flesh them out into scene descriptions. Here’s where you get more detailed, but remember, your outline doesn’t need to be as polished as your script—it’s more like a rough sketch.
For example, let’s take one of our beats and turn it into a scene outline:
Beat: Hero faces the first major obstacle.
Scene Outline:
- Scene Heading: INT. ABANDONED WAREHOUSE – NIGHT
- Description: Our hero enters the dimly lit warehouse, nervous but determined. They scan the room, looking for clues.
- Action: Suddenly, the antagonist’s henchmen jump out from behind crates, weapons drawn. A fight breaks out, and our hero narrowly escapes, but not without injury.
- Character Action: Hero ducks behind a stack of crates, breathing heavily, trying to gather their thoughts. They know they’re in over their head.
See how the outline isn’t fully fleshed out with dialogue, but it’s still clear what’s happening and how the tension is building? That’s the beauty of a screenplay outline — it’s not about the exact words; it’s about getting the right moments and scenes in place.
Step 4: Review and Refine
Once you’ve filled out your outline, step back and take a look at the bigger picture. Are the stakes rising in each act? Is the conflict escalating in a way that makes sense? Are there moments where the action slows down too much or gets too repetitive? This is your chance to play around with the pacing and structure before diving into the actual writing.
The Outlining Debate: Not Every Writer Does It, But It Helps
While we’ve talked a lot about why outlines are essential for most writers, it’s important to recognize that not every screenwriter follows this process. Take Aaron Sorkin, for instance — he doesn’t outline. His process? Dive right into the writing and let the dialogue and character dynamics drive the story. And guess what? It works for him.
But here’s the catch: Not everyone is Aaron Sorkin. He’s got decades of experience, a distinctive voice, and a mastery of structure in his head. For the rest of us, a solid outline is a blueprint to help organize thoughts, catch plot holes early, and keep the pacing tight (while potentially saving ourselves months of rewrites).
So, should you outline? If you’re just starting out, definitely. If you’re a seasoned pro like Sorkin, maybe not. The key is knowing what works for you.
No Outline? No Problem — Here’s What You Can Do Instead
If you’re one of those who prefer to skip the outline, there are other ways to stay on track. Some writers begin by just writing the first scene or two, discovering the direction of the story as they go. Others dive into character development, knowing that the plot will fall into place once the characters start to take shape.
Speaking of Aaron Sorkin, just because he doesn’t outline doesn’t mean he doesn’t have a method to his (genius) madness. Watch this fantastic breakdown by YouTube channel Behind the Curtain on The Social Network:
The point is that while an outline can help provide structure, there’s more than one way to approach writing a screenplay. Your process should support your creativity, not hinder it.
Final Thoughts
An outline is the best investment you can make in your screenplay. It saves you time, strengthens your story (you’ll even get to know it better), and helps avoid major rewrites.
So, before you jump straight into writing, map out your screenplay outline — your future self will thank you.
Time to Write: Bring Your Screenplay to Life with Celtx
Your outline is locked in. Now what? It’s time to start drafting your script — and Celtx makes it seamless.
✅ Automatic screenplay formatting (no more tabbing endlessly)
✅ Drag-and-drop storyboarding to rearrange scenes easily
✅ Collaboration tools for real-time feedback
? Get started today — write your screenplay in Celtx. Try it free!
? Explore More from the Celtx Blog Archives:
? Hook, Hold, and Deliver: The Screenwriter’s Guide to Pacing
? How to End a Screenplay (A List of 21 Different Ways)
? The 10 Best Screenwriting Agents and Agencies