Pre-production is where your film either quietly thrives or slowly suffocates. It’s the stage where excitement meets logistics, where vision meets budget, and where precious and irreplaceable time starts slipping through your fingers.
Every decision you make here echoes across the shoot. And nothing reveals your process more clearly than how you storyboard.
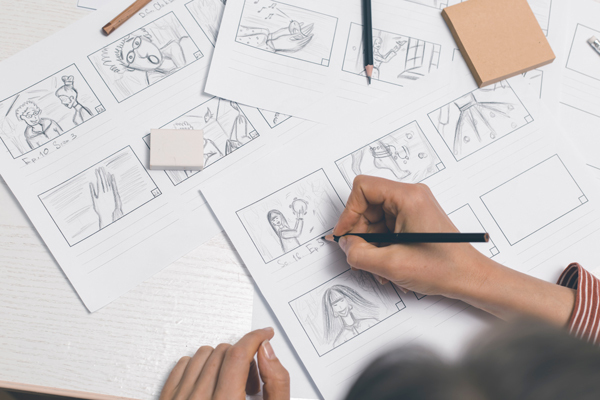
For decades, directors hunched over sketchpads, flipping paper, erasing pencil smudges, and photographing pages to email to collaborators. It was tactile and, in many ways, romantic. There’s something undeniably cinematic about graphite on paper, pinned to a corkboard like a detective mapping a case.
But unfortunately, romance doesn’t equal efficiency. Today’s productions move faster, involve more stakeholders, and demand greater flexibility than ever before.
If you’re still clinging to paper because “that’s how it’s always been done,” you may be unwittingly bottlenecking your own production.
In today’s blog we’ll explore why that shift from paper to pixel matters more than ever.
Table of Contents

The Evolution of the Storyboard: From Paper to Pixel
Storyboarding has been a cornerstone of visual storytelling since the early days of Hollywood. Studios like Walt Disney Productions revolutionised the practice by meticulously mapping animated sequences frame by frame, pinning drawings to walls and physically rearranging scenes until the rhythm felt right.
That analogue system was groundbreaking for its time. It allowed teams to visualise complex narratives before a single frame of film was exposed.
But filmmaking has evolved dramatically since then. Deadlines are tighter, budgets are leaner, and collaboration often happens across cities or even continents. Your director of photography might be remote. Your production designer may be juggling multiple projects. Producers expect revisions in hours, not days.
Meanwhile, the rest of your workflow has already embraced digital transformation. We moved from film stock to digital cameras. We replaced flatbeds with non-linear editing systems like Avid Media Composer.
Post-production thrives on speed, duplication, and version control. Storyboarding deserves the same upgrade. Paper had its era, but pixel aligns with the pace of modern production.
Here is an episode from Celtx Academy on how to use Celtx to storyboard your next project:
Why Physical Sketches are Bottlenecking Your Production
Physical sketching feels productive because it’s tangible. You sit down, draw frames, scribble arrows, and make notes about camera movement. The pages stack up beside you, offering visible proof of progress.
But what happens when a script revision changes the scene’s geography? You erase, you redraw, you photograph, you resend. Then your DP suggests a wider lens. Back to the page you go. Multiply that by thirty setups and the inefficiencies become glaring.
Paper is inherently linear, yet production is anything but. Scenes shift, shot sizes evolve, and creative conversations spark new ideas daily. Physical boards create invisible friction because they resist change.
There’s also a psychological barrier at play: once you’ve invested time in a drawing, you become subconsciously attached to it. That attachment can make you less open to adjustments.
Add to that the collaboration limitations and there’s no simultaneous editing, no quick duplication of variations, no seamless archiving. You begin to see how paper slows momentum. In fast-paced productions, flexibility isn’t optional; it’s oxygen.
Try Celtx Digital Storyboarding Software for free!
5 Reasons to Switch to Digital Storyboarding
The argument for digital storyboarding is all about practical advantage. Here are just some of those advantages:
1. Speed Without Sacrificing Clarity
Digital storyboarding dramatically accelerates iteration. Instead of redrawing entire frames, you duplicate, resize, crop, and adjust with minimal effort.
Want to test a tighter close-up or shift a character’s eyeline? A few clicks accomplish what once took several minutes of sketching. That saved time accumulates across dozens of setups, giving you more space to refine creative decisions rather than execute repetitive redraws.
2. Real-Time Collaboration with Your DP
Filmmaking is collaborative by nature, and your director of photography should help shape visual language from the earliest stages. Digital platforms allow you to screen share, annotate, and adjust live during creative discussions.
Rather than emailing static images back and forth, you co-create the visual plan. This shared process strengthens alignment and reduces ambiguity before you ever step onto set.
3. Instant Version Control and Revisions
One of the most powerful advantages of digital tools is built-in version control. You can duplicate entire sequences, experiment with bold alternatives, and revert to previous drafts without losing work.
Producers appreciate the organisational clarity, and you gain creative freedom. Instead of fearing mistakes, you embrace experimentation because nothing is permanently erased.

4. Seamless Integration with Production Workflows
Digital storyboards don’t exist in isolation. They can export directly into shot lists, scheduling software, and presentation decks. Lens notes, lighting cues, and blocking details can be embedded within the board itself.
This integration reduces redundancy and ensures that your planning documents remain synchronised. The storyboard becomes a living part of your production ecosystem rather than a static reference point.
5. Professional Presentation for Investors and Crew
Presentation communicates preparedness. A clean, organised digital storyboard deck signals professionalism to investors, collaborators, and crew. It demonstrates that you’ve thought through composition, pacing, and coverage.
You don’t need elaborate artwork; you just need clarity. Digital layouts enhance readability and structure, helping others quickly grasp your vision and trust your leadership.
Okay, so let’s compare physical vs. digital storyboarding:
| Feature | Physical Sketches | Digital Storyboards |
| Revision Speed | Erase and redraw manually | Drag-and-drop, resize, swap frames instantly |
| Sharing | Hand-deliver boards or scan and email | Instant link sharing with real-time access |
| Artist Skill | High drawing skill often expected | No drawing skill needed |
| Script Integration | None. Must reference script separately | Automatically syncs to script scenes |
| Shot List Creation | Manual transcription from sketches | Auto-generates directly from the board |
| Version Control | New physical copies each revision | Built-in version tracking and duplication |
| Collaboration | Sequential feedback only | Simultaneous collaboration and comments |
| Presentation Quality | Dependent on drawing ability | Clean, professional layout by default |
| Archiving | Physical storage or scanned files | Cloud-based, searchable, and organised |
The difference isn’t aesthetic but operational. Every manual rewrite, every scanned JPEG, every rewritten shot list is time lost to friction. That friction adds up. Digital platforms collapse multiple workflow steps into one unified system. Instead of redrawing frames and retyping notes, you’re refining creative decisions.
That’s the efficiency gap. And the time you save here is time you spend on set working with actors, adjusting lighting, refining performance, and solving real creative problems instead of paperwork ones.
How to Create a Digital Storyboard Without Being an Artist
You don’t need to be an illustrator to create a professional storyboard. All you need is structure and a repeatable process. Here’s a simple step-by-step approach that keeps things efficient and production-focused:
Step 1| Break Down the Script by Beats
Before drawing anything, identify the emotional and visual beats of the scene. Where does power shift? When does new information land? Each beat usually justifies a new frame. This prevents over-boarding and ensures every panel has purpose.
Step 2 | Define the Purpose of Each Shot
Ask yourself what the shot needs to communicate. Is it geography, tension, isolation, intimacy? When you know the intention, you don’t waste time overcomplicating the frame. You focus on composition that serves story.
Step 3 | Use Simple Shapes for Blocking
Start with stick figures or basic shapes. Mark character positions, eye lines, and movement with arrows. Add minimal background lines to suggest walls, doors, or windows. The goal is spatial clarity. If someone else can understand the blocking at a glance, you’ve succeeded.
Step 4 | Add Essential Technical Notes
Include lens ideas, camera movement, and shot size beneath each frame. A simple “35mm wide,” “85mm close,” or “slow push in” is enough. This transforms your board from a rough sketch into a strategic document your cinematographer can respond to.
Step 5 | Duplicate and Refine Digitally
Once your initial draft is built, duplicate frames to test variations. Try a tighter crop. Shift the camera lower. Reverse the angle. Digital tools allow you to experiment without losing your original concept. Exploration becomes efficient instead of exhausting.
Step 6 | Share Early
Send your boards to your DP and production designer before locking them. Invite feedback. Small adjustments now prevent confusion later. Treat your storyboard as a collaborative draft, not a finished artwork.
Following this structure keeps your focus on storytelling rather than drawing skill. Professionalism comes from clarity and intention, not artistic flourish.
Common Digital Storyboarding Mistakes (and How to Fix Them)
Even strong directors fall into predictable storyboarding traps, but most mistakes are easily corrected with a clearer process.
Over-Detailing the Frame
Spending excessive time rendering background textures, costume folds, or facial expressions rarely improves production efficiency. The fix is to limit detail to elements that influence blocking, lighting, or camera placement. If a detail won’t change a practical decision on set, simplify it. Set a time limit per frame to prevent perfectionism from slowing momentum.
Ignoring Camera Language
A storyboard without lens indication or movement notes leaves too much open to interpretation. The solution is straightforward: add concise technical annotations under every panel. Include shot size, approximate focal length, and any camera movement. Even brief notes like “locked-off wide” or “slow push-in” dramatically strengthen clarity and reduce guesswork.
Treating the Storyboard as Final
Some directors unconsciously treat their boards as sacred once completed. This rigidity can stifle creative discovery during rehearsals or location visits. The fix is to build revision into your workflow intentionally. Duplicate versions, label drafts clearly, and remind collaborators that boards are blueprints, not rigid contracts. Flexibility preserves creativity.
Boarding Without Purpose
Creating frames simply because “every scene needs one” leads to cluttered and unnecessary coverage. The correction is to storyboard only when the shot requires visual precision with complex blocking, choreography, VFX, or intricate camera movement. Let intention dictate quantity rather than habit.
Waiting Too Long to Share.
Holding onto boards until the tech recce or first rehearsal limits valuable input. By sharing earlier, you invite constructive feedback from your DP and designer while there is still time to adjust. Early circulation turns your storyboard into a collaborative tool rather than a private sketchbook.
Correcting these mistakes doesn’t require artistic skill. It requires clarity of intention and a willingness to iterate.

FAQ
Many platforms offer affordable subscriptions, and the time saved often outweighs the cost within a single production cycle.
Draw digitally with a tablet to preserve that tactile feel while gaining revision flexibility.
Absolutely, especially in commercial, television, and effects-heavy workflows where precision and speed are critical.
There may be a short learning curve, but most directors report workflow acceleration within weeks.
They complement it beautifully and can often integrate directly into pre-vis pipelines.
Conclusion
Filmmaking demands clarity, adaptability, and momentum. Paper storyboards served generations of directors well, but modern productions require tools that match their pace. Digital storyboarding reduces friction, strengthens collaboration, and integrates seamlessly into contemporary workflows.
When pre-production runs smoothly, the entire shoot benefits. You arrive on set aligned with your team, confident in your coverage, and prepared for inevitable adjustments.
Modern tools protect it by removing unnecessary obstacles. In a production landscape defined by speed and collaboration, pixels simply move faster than paper.
Start Storyboarding Digitally.
Plan shots, organize scenes, and collaborate visually with Celtx digital storyboards.
Up Next:
The Top 10 Best Storyboarding Software in 2026
If you’re ready to move beyond paper sketches, explore the best storyboarding software available today. This guide breaks down the top tools filmmakers use to plan shots, visualize scenes, and collaborate with their teams.