A movie set is a busy place, with sometimes a large cast and crew to coordinate. Every department must be fully prepared for each scene to ensure everything runs smoothly. In short, efficiency is key!
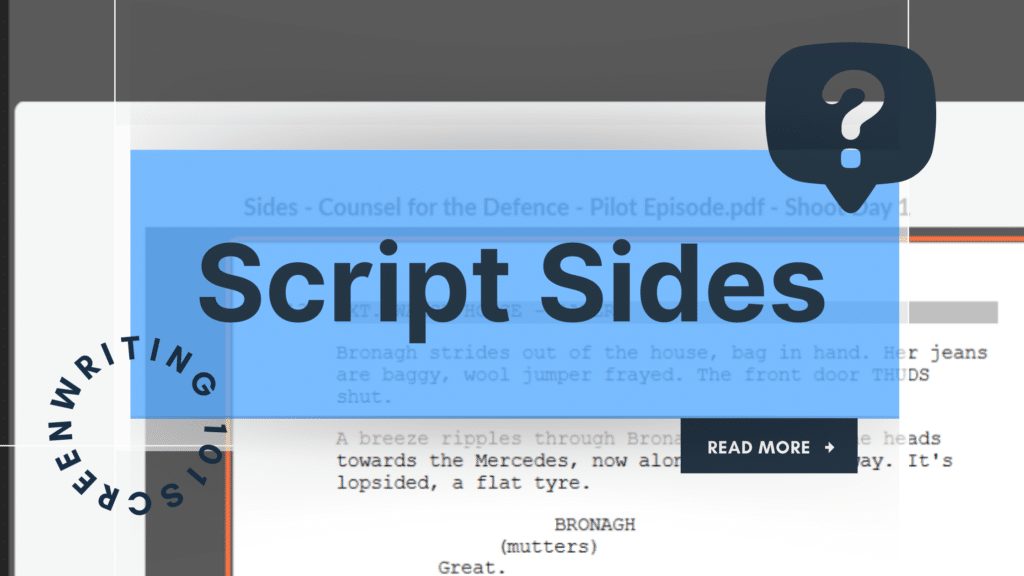
One essential tool that helps a set stay efficient is script sides, allowing actors and crew members to focus on the scenes at hand without having to carry the entire screenplay with them.
What are sides in a script? Well, if you’re in the planning stages of your shoot, or an aspiring filmmaker, then today’s blog is for you! We’ll explore when script sides are, why they’re important, what they look like and how to make script sides for yourself using Celtx’s intuitive tools.
From pre-production to production, we’ll also give you an insight into the best practices for organizing and using your script sides on set. A streamlined and professional production is a happy production!
Let’s get started…

What Are Script Sides?
Script sides (often just referred to as ‘sides’) are excerpts from a screenplay that contain only the scenes being filmed on a particular day. The sides are then distributed among the cast and crew so they can focus on their respective tasks without the distraction of unrelated scenes.
Sides include the scenes from the script that will be shot that day, listed in shooting order and not necessarily chronological order.
On professional film and television sets, sides are prepared daily to reflect the call sheet schedule. Since production schedules are often tight, these documents help everyone involved to stay on track.
But there are also other times where you may see sides being utilized:
1. Auditions
Sides can also be used during auditions. Actors receive sides to perform selected scenes during casting sessions, to ensure they only prepare for relevant scenes. Just like on the set itself, it makes the audition process more efficient.
2. Rehearsals
Directors and actors use sides to practice scenes before shooting to help them refine performances without the burden of the full script.
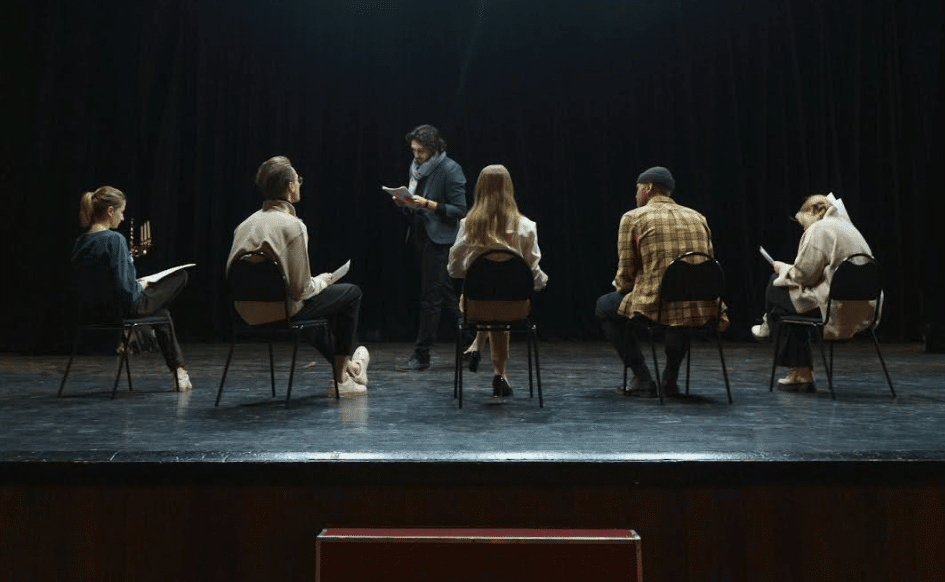
3. Table Reads
Sometimes, specific sections of a script are extracted for script readings with the cast and production team, allowing focused discussions on character arcs, pacing, and dialogue flow.
But for today, we’ll stick to script sides and how they’re used in a film or TV production. Check out this fantastic article from Backstage.com which talks more about sides in acting.
Why Are Script Sides Important?
As we’ve already seen, script sides aren’t just for actors. They are important to each department in different ways:
Actors
Sides allow actors to focus on their lines and performance for specific scenes without being overwhelmed by the entire script. They also help them keep track of emotional arcs and character development within the story.
Directors
Directors can use sides to break down each scene and communicate their vision directly to the cast and crew. It allows them to focus on the nuances of individual performances and technical elements such as shot composition.
Cinematographers
Knowing which scenes are being shot helps camera crews prepare lighting, framing, and angles to match. Lighting setups can be extremely complex, so if the cinematographer can have a clear understanding of the day’s scenes, they can plan much more effectively.
Script Supervisors
Sides help the script supervisor track continuity, blocking, and dialogue accuracy. Their job is to ensure there’s consistency between takes and to prevent continuity errors in the final edit.
Production Assistants (PAs)
PAs distribute sides to cast and crew, ensuring everyone has the correct materials for the day’s shoot. They also assist in making last-minute adjustments if necessary.
Script Sides Example: What Do They Look Like?
Script sides are essentially the selected script pages which include the following details:
- Scene numbers and descriptions
- Character dialogue
- Scene directions and action lines
- Page numbers from the full script
- Sometimes the sides will also include production notes
Don’t confuse script sides with call sheets, which have the overall schedule for the day, including cast and crew, location and shoot details.
Want to find out more about call sheets? Well, we have a blog for that! Click here for our blog with all you need to know!
Sides are usually printed on half-size sheets of paper instead of A4 to save paper and space for the cast and crew carrying them around all day.
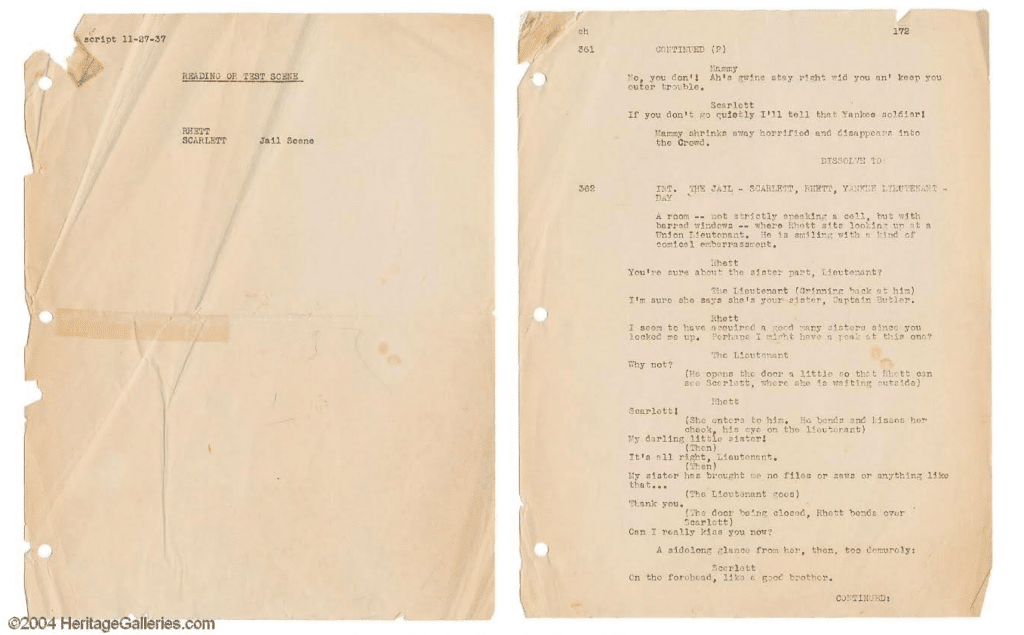
Here’s an example of a script side from the 1939 classic Gone With the Wind. From the document, we can see that this shoot day was November 27th, 1937, encompassing the jail scene with characters Rhett and Scarlett.
Here’s another example of a script side from Marilyn Monroe’s final and unfinished project, Something’s Got to Give, this being a revised section of the script. This is dated April 16th, 1962, and is annotated by Marilyn herself.

Like call sheets, script sides haven’t changed much over the history of filmmaking, their use and format very clear from the beginning.
How to Make Script Sides in Celtx
Not only can you write and edit your script using our intuitive screenwriting software, but you can also plan your shoot and create schedules, allowing you to focus on bringing your vision to life!
Here’s how you can use Celtx to create your own script sides ready to distribute to your cast and crew.
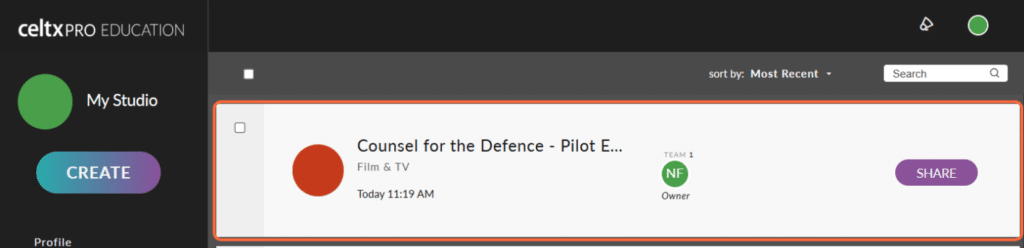
Step 1 | Open Your Script
Starting in your Celtx studio, select the project you’d like to create sides for. In this instance, we’ll use my drama pilot script, Counsel for the Defence.
Step 2 | Select the Scenes
Once the window has opened, you’ll want to select Schedule on the left-hand menu.
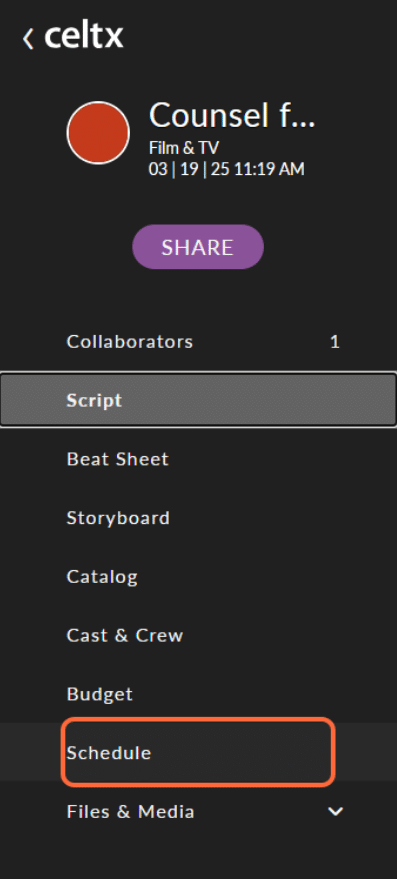
Which will take you to your stripboard, a list of scenes populated directly from your script.
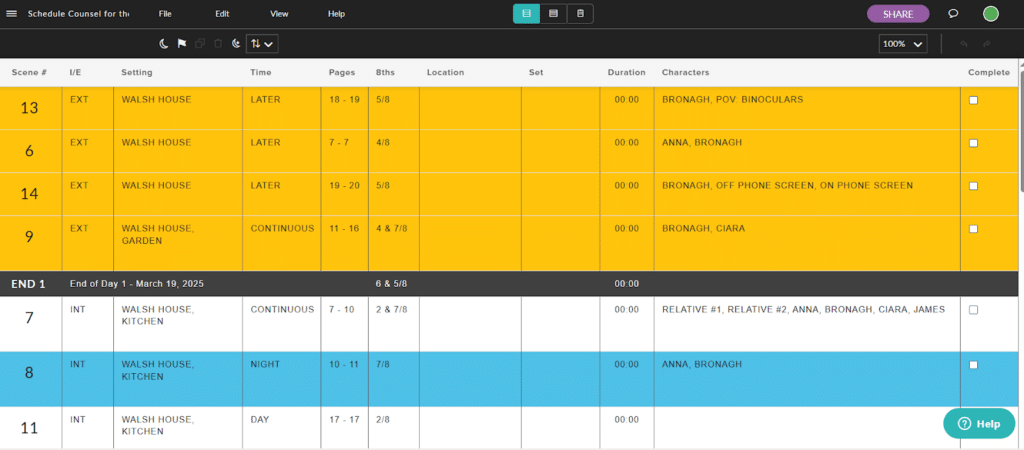
Before you generate your script sides, you’ll need to organise your stripboard or shot list, ensuring that scenes you want to film on the same day are grouped together into shoot days.
If you haven’t done this yet, check out our comprehensive video guide below.
Step 3 | Export as Sides
Once you’ve organized your scenes into shoot days, it’s now time to export them into script sides.
To do this, find these three icons at the top of your screen and click on the right-hand one.

This will take you to the Call Sheets and Reports section. Returning to the left-hand menu, select Sides.
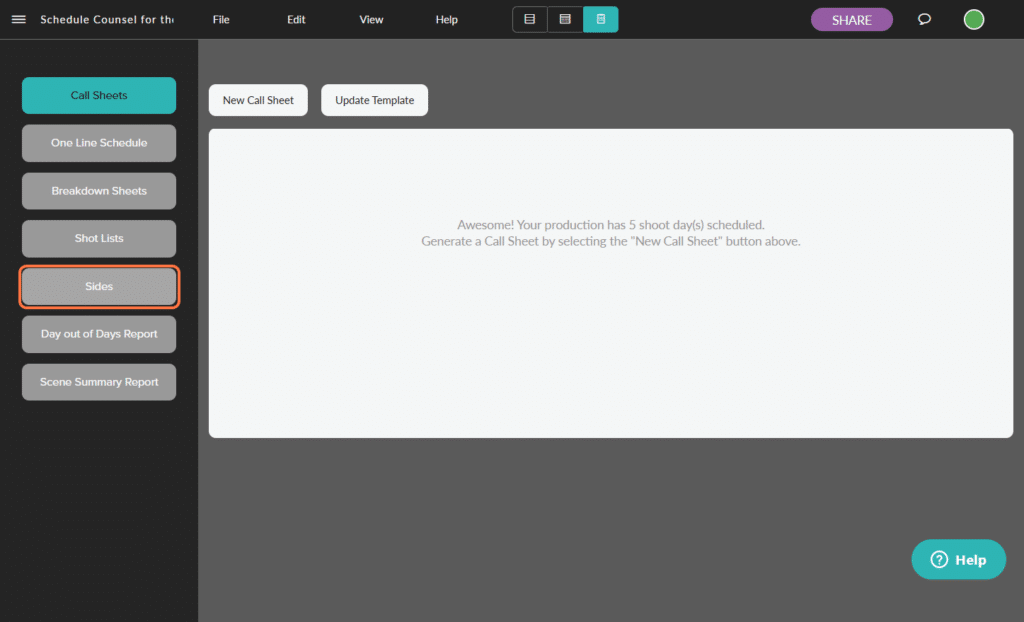
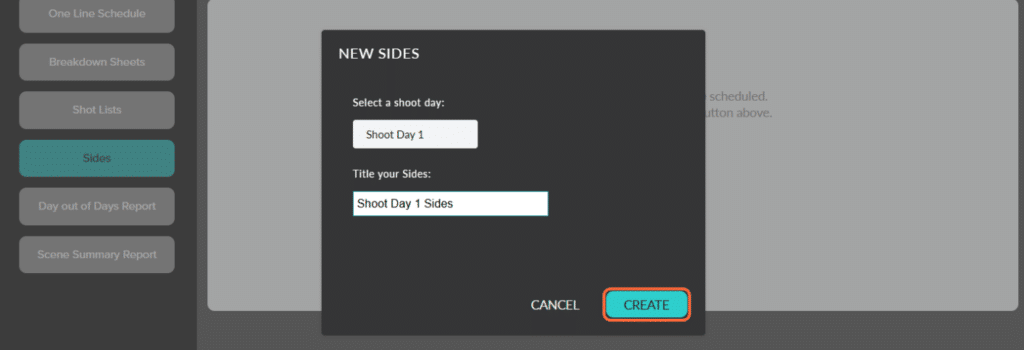
In the new window, click New Side.
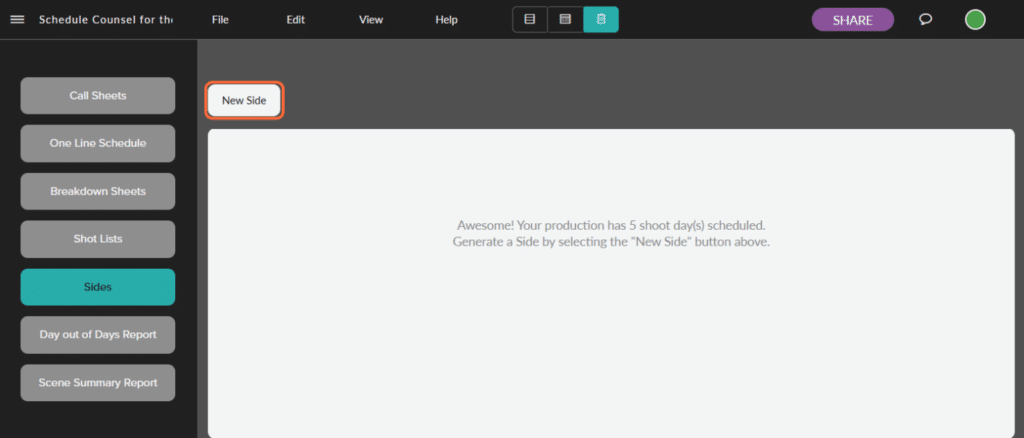
A smaller window will appear in the middle of your screen, where you’ll be able to generate script sides for each day of your shoot.
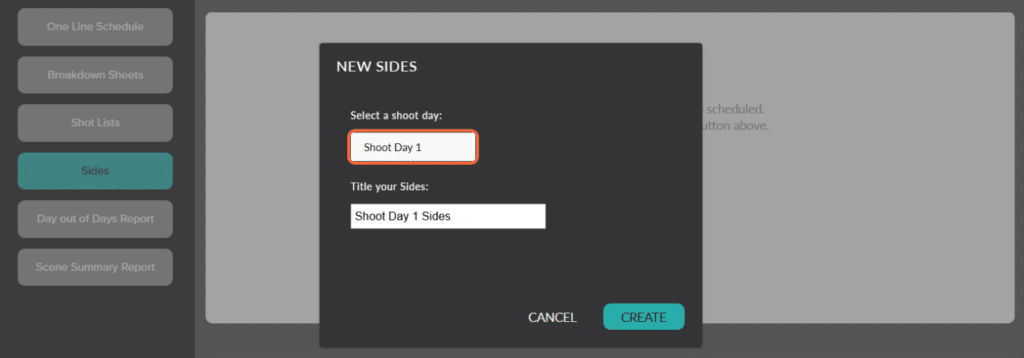
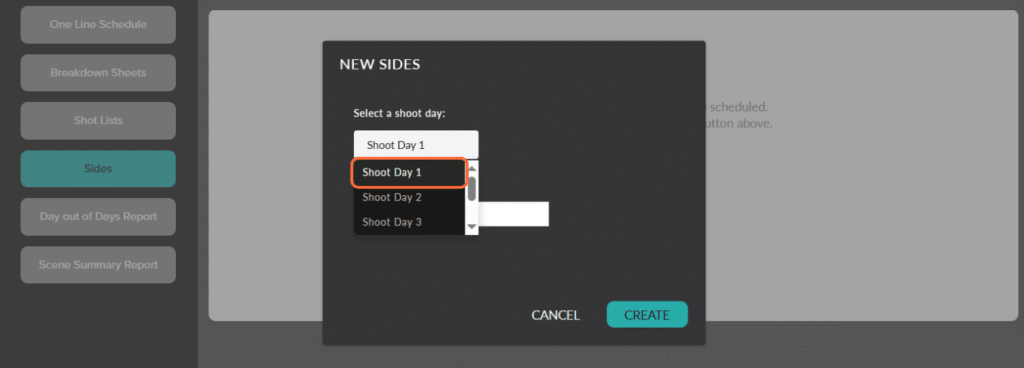
First, you’ll need the sides for Shoot Day 1, so select that from the drop-down menu.
You also have the option to title your sides if you choose to.
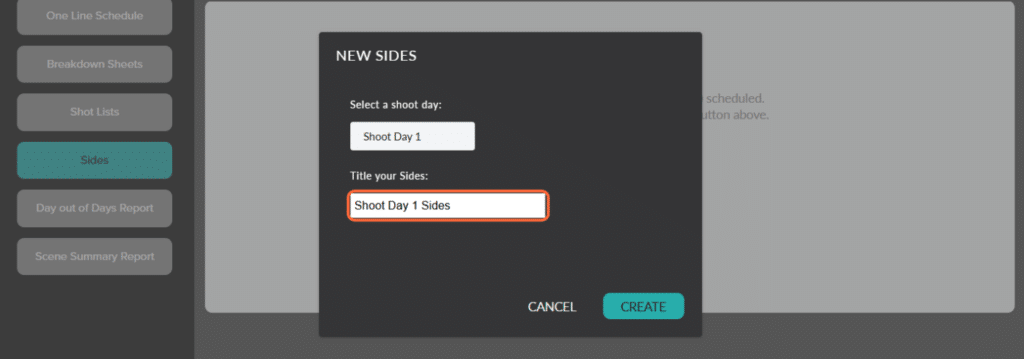
Once you’re happy, click Create.
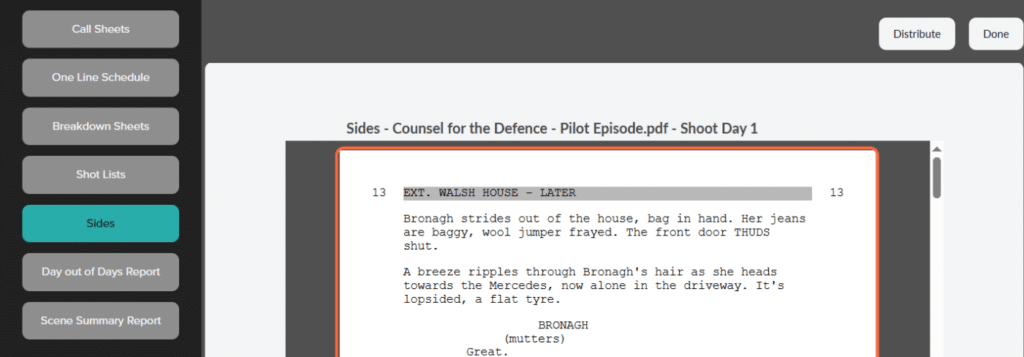
Then just like that, you have your sides generated, and all in a few clicks!
Step 4 | Distribute to Your Cast and Crew
You’ll want to distribute each day’s script sides one day in advance to give your cast and crew the opportunity to become familiar with what’s expected of them, as well as make their own notes. You can either email or print copies for each department.
Of course we’ve made this process as straightforward as possible for you. To email your script sides to your production team, follow these steps:
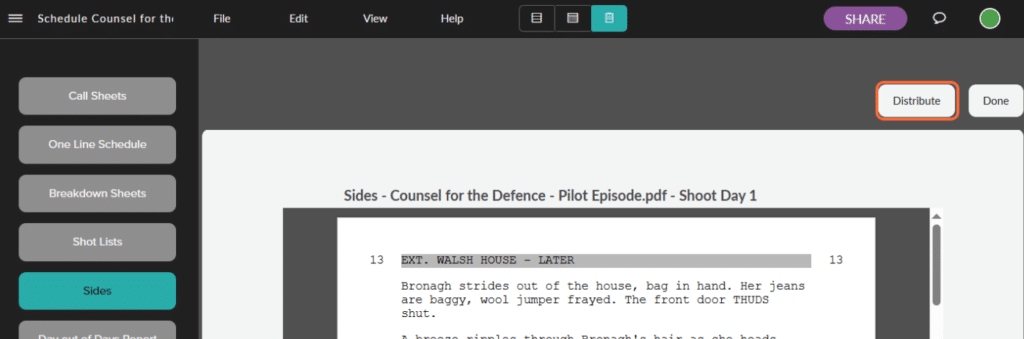
Click the Distribute button on the top right of your screen.
A new window will appear. From the left-hand menu, select Add Recipients.
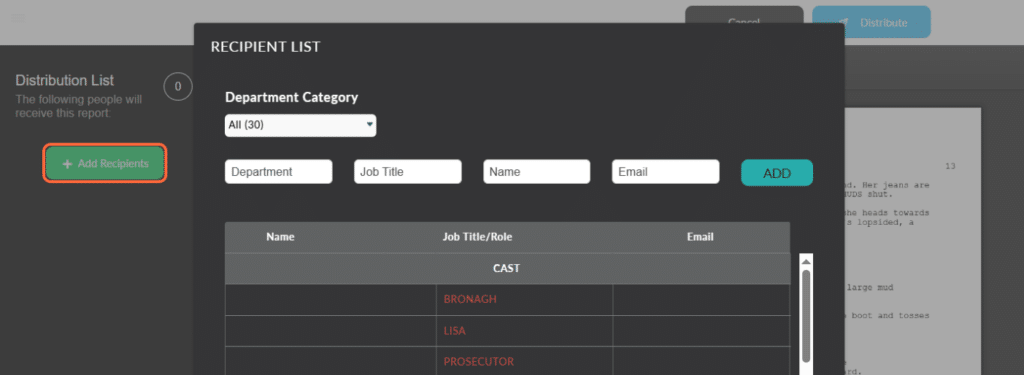
Here you can add all your cast and crew who you wish to send the script sides to.

Once you’ve added everyone, click Update, which will take you back to the previous screen. Write your message and subject just like you would in an email.
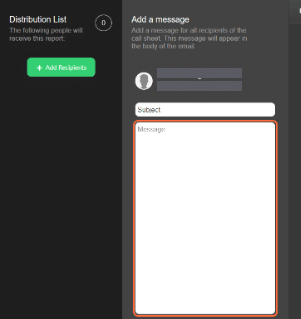
Finally, it’s time to distribute your sides. Click on Distribute, and you’re done! Now all you need to do is repeat this last step for the rest of your shoot days.
To see this process in action, check out our video guide below for more on how to create your own script sides with Celtx:
Best Practices for Organizing & Using Script Sides
It’s all well and good creating and distributing your script sides, but they’re no use if they aren’t being utilized in the right way on set.
Here are some of our top tips on how you can make the most of script sides on your next shoot.
1. Keep Sides Organized
Make sure each side is labelled with the date, scene number and script version. If you’ve used Celtx’s scheduling system to create your sides, this should be done for you.
Also use folders or binders to keep sides in order, especially for multi-day shoots, so your sides don’t get jumbled up.
Consider using a color-coded system for different departments, for example, blue for actors, red for the director, green for the cinematographer etc.
However you decide to organize your sides, make sure it works for you and your crew.
2. Update Sides Regularly
If the script changes, make sure you update your sides to reflect the latest version, and ensure all departments receive it on time. There’s nothing worse than cast and crew arriving on set to find the information they have is incorrect.
3. Highlight Key Details
Mark important stage directions, props, or costume notes with colors or annotations to emphasize critical instructions.
You could also add blocking notes for actors and cameras movements for cinematographers.
4. Distribute Efficiently
If you’re running a larger film set, we’d recommend assigning a crew member (often a PA) to manage side distribution. This is best done via email to reduce paper waste; that way the cast and crew can download the sides onto a device such a tablet or phone to carry around with them.
If you do decide to use printed sides, make extra copies in case of loss or damage. You don’t want your shoot day to come to a grinding halt because someone lost their script!
5. Train Cast and Crew on Sides Usage
Before you begin your shoot, make sure everyone understands how to use their sides. You could also encourage actors to review and rehearse with their sides before stepping on set.
A quick morning meeting at the start of each shoot day to go over the sides and answer any questions will also set you off in good stead for an efficient production!
Frequently Asked Questions About Script Sides
Script sides include only the screenplay pages necessary for a single day of filming or a particular audition. These concise documents keep the cast and crew focused on the immediate scenes and eliminate the need for anyone to carry a full, heavy script on set.
Casting directors provide sides to ensure that every performer interprets the exact same material, which allows for a fair and standardized comparison during the casting process. This focus helps actors master character personalities and pivotal moments without the distraction of scenes irrelevant to the role.
Professional teams typically print script sides in half-letter size (8.5” x 5.5”) and staple them in the order of the daily shooting schedule. To prevent confusion on set, crew members often use digital lines or black markers to cross out any dialogue or scenes on the page that the production is not shooting that day.
Shakespearean theater companies originated the term. Because full scripts were expensive to print and producers feared theft by rival companies, they only gave actors the “sides” of the dialogue containing their characters’ specific lines.
While you can manually duplicate a script PDF and delete unnecessary pages, production software like Celtx streamlines the entire process. You simply reimport your shoot day from your schedule and export the specific daily sides directly for your team.
Conclusion
Script sides are a vital tool in film and television production, keeping everyone on the same page—literally. From actors refining their performances to cinematographers planning their shots, well-organized sides contribute to a smoother, more efficient set.
Why not leverage Celtx’s intuitive tools to easily generate and distribute script sides to ensure your cast and crew have the information they need?
Whether you’re an indie filmmaker or working on a larger production, mastering script sides will help streamline your workflow. With proper organization, regular updates, and smart distribution, your production will run like a well-oiled machine!
Focus on your story, not your formatting.
Let Celtx’s Script Editor automatically apply all industry rules while you focus on the story.
Up Next:
What is a Table Read? How to Prep, Run, and Learn from Your Script’s First Performance
Once your script sides are ready, it’s time to hear the story out loud. Learn what a table read is, why it matters, and how to run one that reveals pacing issues, awkward dialogue, and story gaps before you hit set.