There’s something magical about a camera that moves. It’s not just motion, it’s emotion. The way a camera glides, pivots, or shadows a character can make us feel something before a word of dialogue is even spoken. One of the most powerful tools in a filmmaker’s visual arsenal is the tracking shot. A moment when the camera quite literally joins the story in motion.
In today’s blog, we’ll break down what a tracking shot actually is, why it’s so narratively potent, and how to use it wisely, whether you’re behind the camera or writing the words that get it rolling. It’s one of the six key camera shots we need to know about as screenwriters.
Lights, camera, action!
Table of Contents
- The Tracking Shot Defined
- Types of Tracking Shots
- Tracking Shot vs. Dolly Shot
- The Narrative Power of the Tracking Shot
- Iconic Examples of the Tracking Shot
- Writing the Tracking Shot
- FAQs
- Conclusion
The Tracking Shot Defined
A tracking shot is any shot in which the camera moves through space during the take.
A shot like this doesn’t cut from one angle to another but travels, following the subject (or sometimes leading them) through the world of the film.
Traditionally, “tracking” meant that the camera was mounted on a track, like a mini railroad, allowing it to glide smoothly alongside or behind the action. But in modern filmmaking, the term has expanded. You’ll see it applied to Steadicam shots, handheld moves, and even drone footage.
The key idea is that the camera moves continuously through physical space to maintain or shift perspective. It doesn’t involve zooming in or out (that’s changing the lens’s focal length, not the camera’s position). Instead, a tracking shot involves literal movement; the kind that makes us feel we’re walking, running, or floating with the characters.One of the earliest (and best) examples of a tracking shot is from 1927 movie Wings. Check it out:
Types of Tracking Shots
Let’s take a tour through the common variations of the tracking shot.
Forward Tracking Shot
In this shot, the camera moves toward the subject. It’s often used to build intensity or intimacy. Think of the camera gliding toward a character as they walk down a hallway, the frame slowly tightening as we feel ourselves drawn closer into their emotional world.
Forward tracking can also create a sense of momentum. Spielberg in particular loves this; the way the camera advances toward the characters in Jaws or Saving Private Ryan gives scenes a living, breathing energy.
Take a look at this brief shot from Saving Private Ryan (1998):
Backward Tracking Shot
The camera retreats, usually facing the subject, while they move forward. It’s an elegant way to stay connected to a character’s face while revealing their environment. It can also feel like the camera is guiding them or perhaps retreating from them as they advance into danger.
A classic example of a backward tracking shot is Danny pedaling through the Overlook Hotel’s hallways in The Shining. We’re constantly moving, but we can’t escape the creeping dread.
Lateral (Side) Tracking Shot
The camera moves sideways, usually keeping the subject centered or in profile. This is a staple of long takes and action scenes because it gives a rhythmic, almost dance-like quality to movement.
Lateral tracking shots often connect spaces, revealing how one part of a world flows into another. In Pulp Fiction, Tarantino uses lateral moves to reveal the geography of the diner or apartment interiors, giving us a visceral sense of “where we are” without disorienting cuts.
Circular Tracking Shot
The camera orbits around the subject, often creating a heightened emotional or dramatic effect. You’ve seen this one before: the “heroes in a circle” shot from The Avengers, or the dizzying revolutions around lovers or fighters mid-scene.
Circular moves can symbolize a turning point, a cycle, or chaos. Done right, they pull us into a moment that feels eternal and electric, as if the world is spinning around the character.
Want to learn more about camera shots in general? This fantastic article from the BFI takes a deep dive into the history of cinematography. A great read!
Tracking Shot vs. Dolly Shot
Ah, the classic confusion. Many people use “tracking shot” and “dolly shot” interchangeably, and in casual conversation, that’s fine. But there’s a subtle distinction worth knowing, especially if you’re on set or writing about one.
Let’s break it down:
A dolly shot refers specifically to a camera mounted on a dolly (a wheeled platform that rolls along a track or smooth surface). It’s a method of achieving smooth motion.
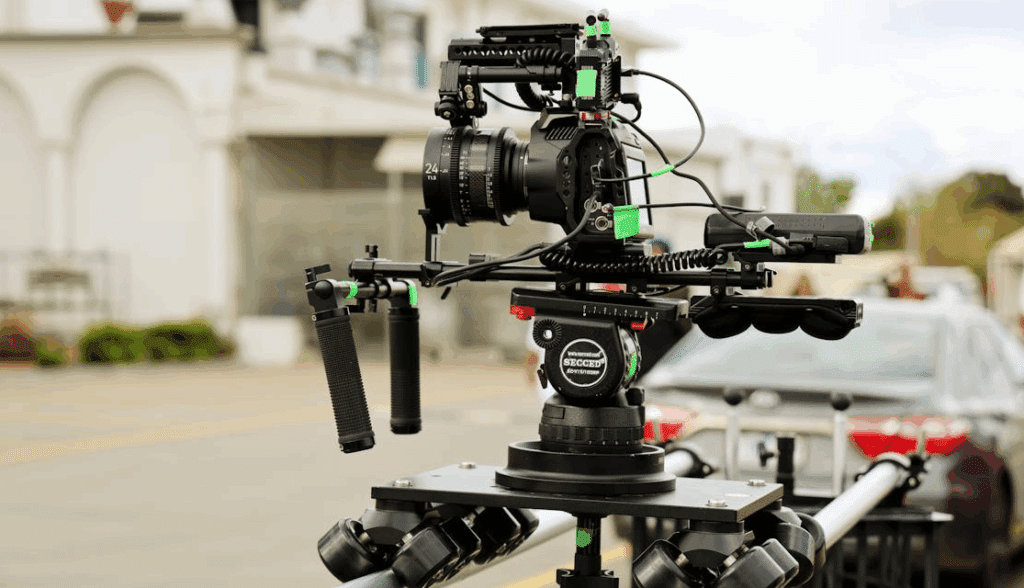
Whereas a tracking shot refers to the result; a shot where the camera follows (or leads) a subject through space.
So, in fact, all dolly shots are tracking shots. But not all tracking shots are dolly shots.
Today, with Steadicams, gimbals, drones, and vehicles, the tracking shot has outgrown its rails. The spirit remains the same and the camera moves with purpose, not just for spectacle-sake.
Does all of this technical lingo sound confusing? Discover more about the anatomy of a movie camera with Fujifilm here.
The Narrative Power of the Tracking Shot
So why does a moving camera hit so hard emotionally?
Well, it’s because movement equals meaning. A well-executed tracking shot follows a character, but it also pulls us fully into their world.
Let’s look at how this shot type works its storytelling magic.
1. Establishing Geography
One of the hardest things in visual storytelling is giving the audience a sense of place. Where are we? How do these spaces connect? Why does that matter?
A tracking shot elegantly solves that. Instead of cutting between static frames, a moving camera lets us experience the layout. For example, the distance from the kitchen to the hallway, the way sunlight filters through each room, and the path that connects a character’s world.
Think of the opening of Atonement: the camera follows Briony through her family’s estate, seamlessly showing us the grandeur, isolation, and emotional tension that defines her world.
2. Revealing Character Emotion
Camera movement can also reflect a character’s inner state. For instance, a slow, drifting track might suggest calm, dreaminess, or melancholy. A jittery, handheld chase might capture anxiety or chaos. And a long, steady Steadicam follow can suggest focus, determination, or obsession.
In Children of Men, the tracking shots are psychological mirrors as well as being impressive feats of choreography. The camera rarely cuts away, forcing us to endure the same urgency, fear, and disbelief as the characters.
3. Immersing the Audience
Long, unbroken tracking shots create a feeling of presence, removing the editorial distance between audience and story. We’re no longer just observers, but participants in the story.
That’s the secret to why tracking shots feel so hypnotic; they blur the boundary between “watching” and “experiencing.” We’re no longer looking at a movie. We’re in it.
Iconic Examples of the Tracking Shot
Goodfellas (1990)
Let’s start with a legend. Martin Scorsese’s Goodfellas features one of the most celebrated tracking shots in film history: Henry Hill (Ray Liotta) leading Karen (Lorraine Bracco) through the back entrance of the Copacabana nightclub.
Shot on a Steadicam, the camera follows them through corridors, kitchens, and crowds in one continuous movement, capturing the seductive allure of Henry’s world.
So why does it work? Well, the shot makes us feel what Karen feels: effortless power, glamour, and intoxication. The unbroken motion becomes a metaphor for the seamless pull of Henry’s criminal life.
Children of Men (2006)
Alfonso Cuarón and cinematographer Emmanuel Lubezki turned the tracking shot into pure experiential cinema.
From the ambush scene in the car to the gut-wrenching warzone sequence, these shots put the audience in the middle of the chaos. The camera moves as if it’s part of the action, ducking, weaving, trembling with fear.
These cool one-takes are extensions of the film’s realism. By refusing to cut away, Cuarón traps us in the same hellish continuity as his characters. We don’t get the relief of an edit. Neither do the characters.
Birdman (2014)
Alejandro González Iñárritu’s Birdman takes the idea to the extreme: the entire film is designed to appear as one continuous tracking shot.
The illusion (crafted by Emmanuel Lubezki again) turns the movie into a fever dream of performance and identity. The camera floats through backstage corridors, streets, and stages, blurring the line between reality and imagination.
Here, the tracking shot becomes a metaphor for artistic pressure; there’s no escape, no cut, no break in consciousness. Just one long, spiraling take into madness.
Writing the Tracking Shot
So how do you call for a tracking shot in a screenplay? Here’s the golden rule: do it sparingly.
As a writer, your job isn’t to direct, but to evoke. You don’t want to handcuff your director or DP by dictating camera moves in every paragraph. But when movement is essential to the emotion or pacing of a scene, it’s okay to imply it.
The key is to keep it simple and natural:
We follow her down the corridor, drifting closer as she reaches for the doorknob.
Or, more subtly:
We move with him through the crowd. Faces blur, the noise swells.
You don’t even need to use the word “tracking.” Just describe the feeling of movement.
If a tracking shot is crucial to the storytelling, you can note it explicitly:
TRACKING SHOT: Henry and Karen slip through the Copacabana’s back hallways, a red world unfolding before them.
But whatever you do, don’t overdo it. A script crammed with “TRACKING SHOT” and “CRANE UP” reads like a camera manual, not a story. Trust that a skilled director will find the right moments to move the lens.
FAQs
The Goodfellas Copacabana scene is often cited as the quintessential tracking shot because it’s a perfect blend of style and storytelling. But depending on who you ask, Children of Men, Touch of Evil, or even 1917 might take the crown.
Not exactly. A dolly shot uses a wheeled rig or track system, while a tracking shot refers to the overall motion of the camera following the subject, no matter how it’s achieved.
A crane shot is when the camera moves vertically or diagonally through space, usually mounted on a crane or jib. It’s great for sweeping, dramatic reveals like pulling up from a battlefield to show the scope of destruction.
As long as the story needs and the crew can manage! Some tracking shots last mere seconds, others (like in Birdman or 1917) span entire scenes or appear to last the whole film. The length should serve the emotion, not just the spectacle.
Conclusion
The tracking shot isn’t just cinematic flourish. It’s one of the purest expressions of what film is: movement through space and time.
When used thoughtfully, it transforms storytelling from static observation into kinetic empathy. It lets us inhabit characters’ journeys, feel the flow of their world, and sense the rhythm of their emotions.
The next time you watch a tracking shot, whether it’s Scorsese’s glide, Cuarón’s chaos, or Iñárritu’s illusion, pay attention to what you feel more than what you see. That’s the real power of the move.
Ready to master the visual language of filmmaking? Sign up for Celtx today.
Up Next:

6 Essential Camera Shots Every Screenwriter Should Know
Now that you’ve mastered the tracking shot, explore five more techniques that help you write—and visualize—your story like a filmmaker.
