If you’ve ever been on a film set, you’ll know that scripts are more alive than you’d think. They mutate and evolve as the production goes on. One day you have “Page 32, Scene 5: dialogue between the hero and villain,” and the next it’s “Scene 4 relocated to page 28, villain now says a different punchline, and oh, insert a car chase here.” Welcome to the world of script revisions!
For filmmakers, script revisions are absolutely necessary but also slightly terrifying if not managed properly. And that’s where script revision colors come in.
In today’s blog, we’re going to explore the why, the how, and the magical rainbow of colors that keep production from descending into chaos.
So, let’s go!
Table of Contents
- What Are Script Revision Colors? (Definition & Importance)
- The History and Purpose of Script Revision Colors
- Understanding the Standard Script Revision Color Sequence
- The Critical Impact of Script Revision Colors on Production
- The Solution: Managing Script Revision Colors in Celtx
- Step-by-Step Guide: How to Use Script Revision Colors in Celtx
- Frequently Asked Questions (FAQs)
- Conclusion
What Are Script Revision Colors? (Definition & Importance)
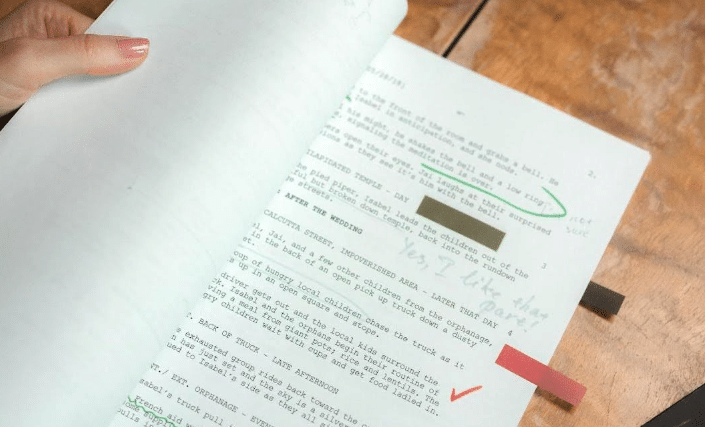
A script revision is any change made to the original screenplay after the first draft has been finalized and distributed. These changes can range from small fixes like typos or line tweaks to massive overhauls such as new scenes, re-ordered acts, or the addition of an entirely new character.
Without a proper system, tracking these revisions can quickly become a nightmare: actors reading the wrong line, directors giving instructions based on an old draft, or production assistants frantically photocopying scripts at 3am to keep everyone on the same page. Literally.
So why have a system for tracking revisions? Well, it keeps things clear, so everyone knows exactly what changed, means fewer mistakes on set, and helps production avoid unnecessary overtime caused by confusion.
So, if you think a color-coded script is just a fancy quirk for obsessive filmmakers, think again. It’s integral to a production’s success.
The History and Purpose of Script Revision Colors
Okay, you may be asking “What do we even need colors? Can’t we just update the script digitally and email it?”
Ah, if only filmmaking were that simple. Here’s the reality:
Printing and distribution on set is still crucial. Digital devices fail, batteries die, and there’s nothing worse than your lead actor realizing their iPad is dead during an important take.
When an actor or crew member sees a pink page in their hands, they immediately know that there’s been a change since the last draft. In short, there’s no need to read the fine print.
And on a set where multiple departments operate simultaneously, colored pages prevent everyone from working off outdated scripts.
It’s for all these reasons that color is a logistical necessity!
Manage your script and your entire production from a single platform. Try Celtx today.

Understanding the Standard Script Revision Color Sequence
Over decades of filmmaking, a standard revision color sequence has emerged. The beauty is that it’s predictable, allowing anyone from PAs to directors to understand what they’re holding at a glance. The usual progression is this:
- White (Original Script): This is the baseline where everything starts.
- Blue: The first initial revision with changes since the white draft highlighted.
- Pink: Next round of revisions after blue.
- Yellow: Adds another layer of revision.
- Green: Further revisions after yellow.
- Goldenrod (Gold): Used after green, continuing the chain.
- Buff, Salmon, Cherry, Tan, etc.: If a script requires more than six rounds of revisions, other colors are used. Different studios may have slightly different sequences, but the principle remains the same.
CELTX TOP TIP: Don’t worry about memorizing the entire rainbow. Most productions never go past green or gold. But when they do, you know things are getting serious.
Script revision colors also expand into the pages themselves! Scriptation explains more here.
The Critical Impact of Script Revision Colors on Production
You may be thinking that script revisions are just sounding like a whole lot of paperwork so far. However, they touch almost every corner of a production, having a huge impact.
Let’s find out why:
1. Scheduling
Every change can shift shoot dates. Need a new location? Need an extra day? Suddenly the blue page becomes a time bomb on a piece of paper!
2. Budgeting
Additional scenes, stunts, or props increase costs. Revision tracking ensures producers can calculate expenses accurately.
3. Crew Coordination
Lighting, sound, wardrobe, and props all rely on knowing exactly what’s happening on each page. A miscommunication here can mean reshoots, undue stress, or worse.
In short, revisions affect everything from your daily schedule to the final pay check. Treat them like the serious business they are.
Want to learn more about screenwriting conventions and what they mean for you? Check out the Writers Guild of America’s Screenwriters Handbook which has everything you need to know!
The Solution: Managing Script Revision Colors in Celtx
While colored pages have worked for decades, digital tools now make tracking revisions a breeze. And one of those tools, believe it or not, is Celtx!
We don’t just help you write scripts, but we make sure you can integrate all your revisions. With Celtx you can:
- Initiate a revision cycle without fear of losing old content.
- Automatically track changes with proper revision marks (the classic asterisk *).
- Generate reports that highlight only what has changed since the last version of your script.
Never risk using the wrong script version on set. Celtx automatically tracks, marks, and color-codes your revisions, making production seamless.
Sign up today (it’s free)!
Step-by-Step Guide: How to Use Script Revision Colors in Celtx
Now it’s time to break down a practical workflow for managing revisions in Celtx! For this example, we’ll use our script The Beach.
Let’s get started:
Step 1 Initiating the Revision
First, you need to set up your revision.
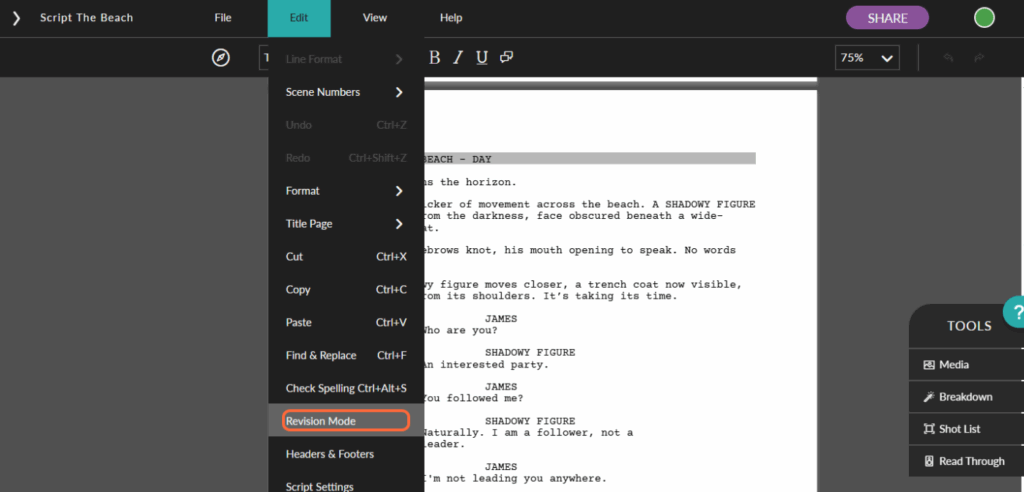
Once you’ve opened your script from the Celtx dashboard, find the Edit button in the top tool bar.

Select Revision Mode from the drop-down menu.
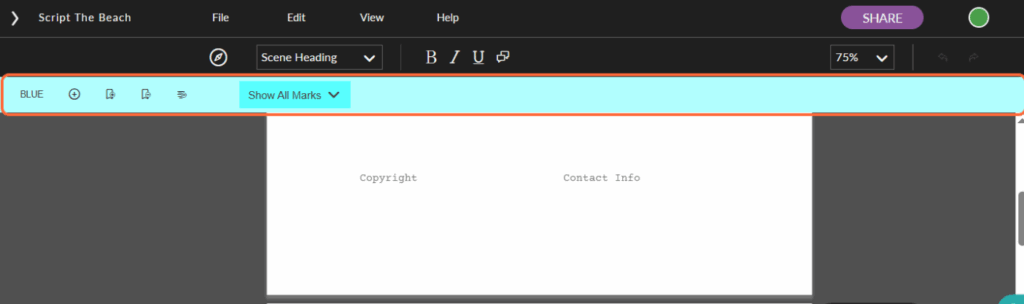
The New Revision panel will appear. Next, you need to name the revision. As this is our first revision, we’ll call it Revision 1.

Once you have your revision name, you need to select the corresponding color. If we follow the standard revision color sequence, we’ll need to start with Blue. Choose this from the Revision Color drop-down menu.

Once you’re happy, click OK.
You’ll now notice a blue band at the top of your writing window. This confirms that revision mode is on and you’re ready to go!
Step 2 | Tracking Changes
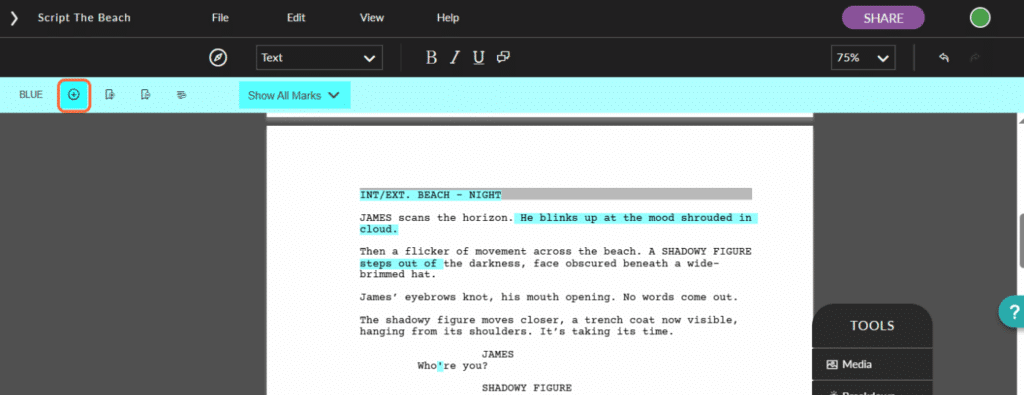
Now it’s time to edit. Make your changes directly in the script. As you do so, the software will automatically mark them with an asterisk (*), so actors and crew know exactly what’s changed. Any amended text will also be written in your chosen color which Celtx will also record, so if you’re moving from blue to pink, the color changes automatically.

You’ll notice that just the color is applied here to make it super simple to see as you’re writing. The asterisks will be displayed once you go to print or distribute the script.
To double check this, click File in the top menu.
Then Print/Download PDF.

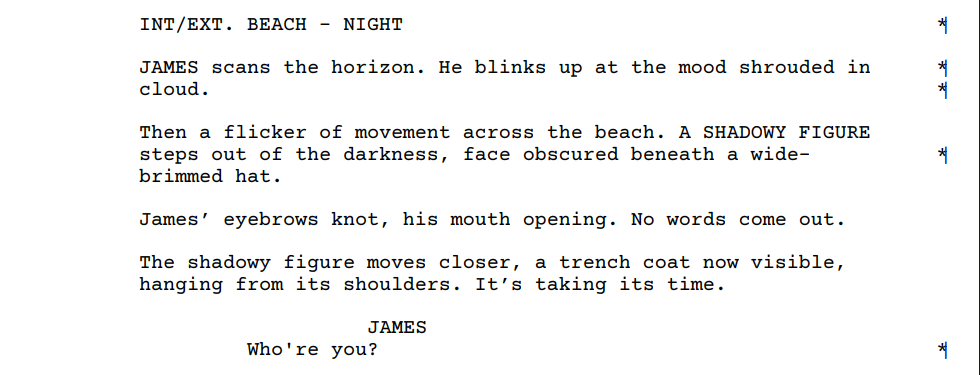
A new window will appear where you’ll see the colors have disappeared, replaced by asterisk (*) marks in the right-hand margin.

Once you’re ready to do a second revision, simply click on the + sign in the revision band.
The New Revision window will reappear. You’ll see in this case it has automatically populated the number and color, following the standard revision color sequence we discussed earlier on.

This system ensures that no change is lost, misread, or accidentally ignored; a real lifesaver when time is tight on set.
Step 3 | Generating the Report
Once revisions are complete, Celtx allows you export your changes in two ways:
- Revision-only scripts showing revisions for one or more revisions.
- Script sides for each shoot day.
How do you do this? Well, without further ado…
Revision-Only Scripts
To export your revised script, click on File.
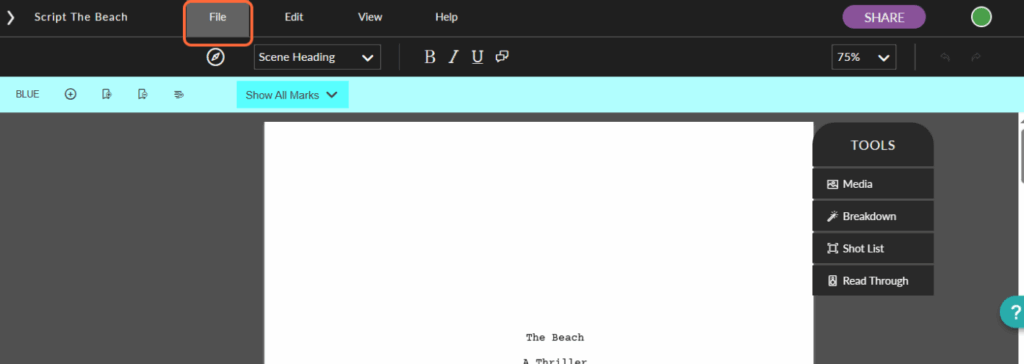
Next, choose Print/Download PDF.
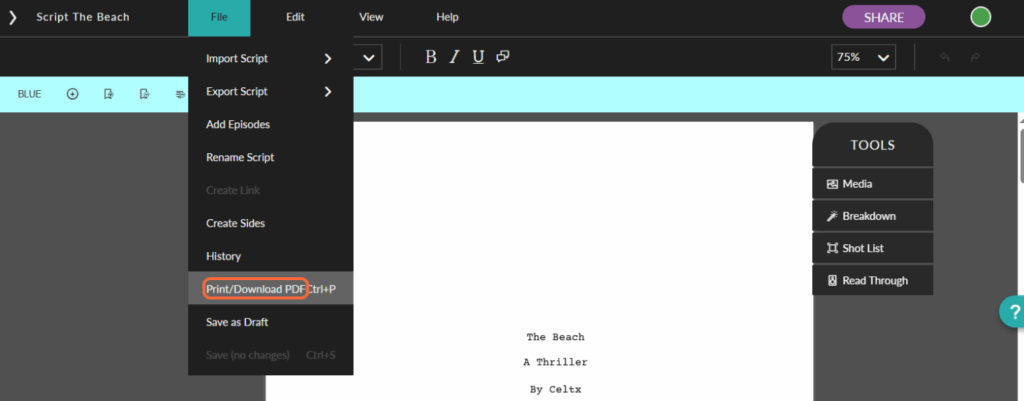
If you want to print or download in your current revision color, select Script with Color Revisions from the drop-down menu.

Then choose Print Preview to confirm.

From here, a new window will appear with your script ready for printing. As you can see, the asterisk (*) marks are shown in the right-hand margin, with blue marks to indicate the color revision set.
From there, you can either Print or Download to PDF depending on your preference.
Script Sides
Or, if you’re in the middle of production, you may want to apply revisions to your script sides, ready to distribute to your cast and crew.
First, you’ll need to expand the left-hand tool bar on your script window.

Next, click on Schedule.

Then find the icon trio in the top tool bar and choose the right-hand option, Callsheets & Reports.

The Call Sheet window will appear.
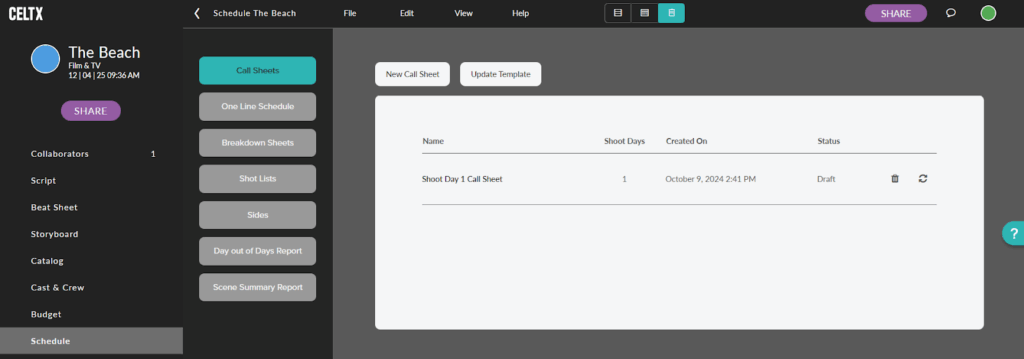
Click on Sides in the new menu.
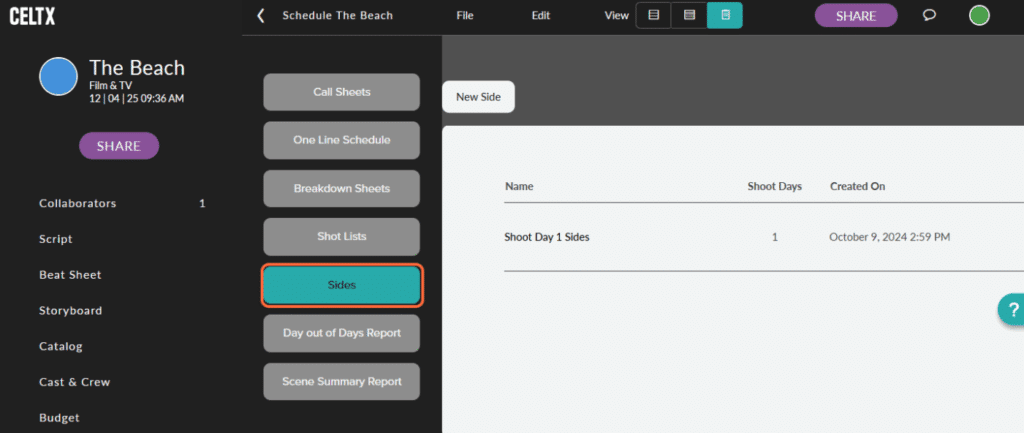
Then scroll right and find the cycle icon for Reimport Shoot Day. Click on this to apply the changes you’ve made in the script.
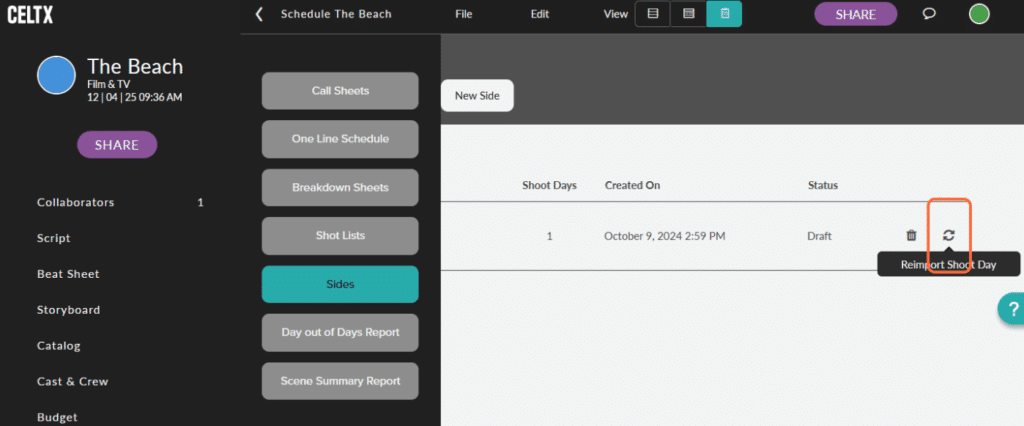
Next, click on the Shoot Day you want.

As you can see, all of the changes we’ve just made in the script have been applied, ready for production. It’s as simple as that!

For a full rundown of Celtx’s revision mode features and applications, check out our informative video below:
Frequently Asked Questions (FAQs)
Typically, the order goes as follows:
– White
– Blue
– Pink
– Yellow
– Green
– Gold
– Buff
– Salmon
– Cherry
– Tan
Some studios may adjust, but this is the classic order.
Not usually. Minor typos or punctuation fixes can often be included in the same revision cycle. Only significant changes warrant a new color.
The asterisk marks that line or paragraph has been changed since the last revision. Actors and crew can quickly scan pages and see exactly what’s new.
A locked page is one that is frozen and cannot be edited. This ensures that no changes sneak in after a revision has been officially released, keeping production consistent.
Conclusion
Script revision colors are a lifeline for filmmakers. They ensure clarity, prevent chaos, and save time and money on set. In today’s digital era, tools like Celtx make the process even smoother, automating color selection, tracking changes, and generating reports that keep the entire production informed and aligned.
So next time you hold a pink page in your hand, remember it’s a carefully coordinated signal in the symphony of filmmaking. Embrace it, track it, and let it guide your production to success.
It’s important to see revisions as opportunities to make your story stronger, your schedule smoother, and your set a little less chaotic. And in the world of filmmaking, that’s pure gold.
Focus on your story, not your formatting.
Let Celtx’s Script Editor automatically apply all industry rules while you focus on the story.
Continue Your Workflow:
What Are Script Sides? Examples & How to Use Them
Once revisions are finalized, make sure every department has exactly what they need. Learn how script sides streamline communication and keep production running smoothly — especially when pages change fast.